Chalkboard Wall Calendar
Posted on: May 22, 2011
- In: Decor | DIY | Organization
- 2 Comments
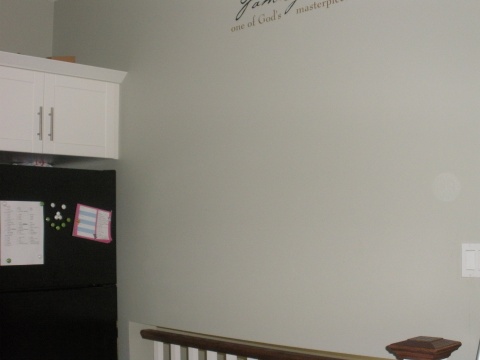
We have a half wall in our kitchen above the railing that opens to our family room below. I’ve wanted to put something useful in that space and have tossed around a few ideas in my head. For a while, I had planned to put storage cubes on that wall to hold small kitchen items and decorative things but I decided against it (my dad already made the cubes for me…I promise, they’ll be put to use elsewhere!).
I found the idea for the chalkboard wall calendar on the Martha Stewart website and was instantly inspired. I had to scale back the size a little bit so it would fit and my short little self would still be able to write on the upper squares since it was only on the top half of the wall (I do need a step stool still!).
Here’s how to create a wall calendar of your own:
1. Measure and mark lines for the border and squares of your calendar. I made five rows of seven squares (each square was 8×8″) to accommodate for the maximum 31 days in a month. I also added a row of 3×8″ squares at the top for the days of the week. I debated adding a solid band of chalkboard paint to write the month in but decided against it because I was running out of space. Instead, I will just write the date in one of the inevitable empty squares each month.
2. Tape out the squares for the first colour of chalkboard paint. I was only doing two colours so I taped out a checkerboard pattern. You can use as many colours as you want and with the tintable chalkboard paint from Rona, the possibilities are endless! I added little pieces of tape in the squares I wasn’t painting right away so I didn’t make any mistakes!
3. Paint the squares with the first colour and let cure as per the instructions on the paint can. I used black chalkboard paint that I already had at home and it had to cure for 24 hours. I pulled the tape off too soon and the paint came off in some spots.
4. Tape out the squares for the second colour, paint and let cure as above (repeat for as many paint colours that you are using). Because the black chalkboard paint had come off when I removed the tape, I painted my remaining squares with grey chalkboard paint free hand with a foam brush. I didn’t want to risk more paint coming off with the tape for the second colour so I didn’t bother with it, trusting in my steady hand.
5. Remove the tape, step back and admire your work! Depending on your brand of paint, you’ll have to wait up to three days before conditioning the chalkboard with chalk (rubbing chalk over the whole surface and then wiping off with a dry cloth).

Because I had freehanded the second colour of chalkboard paint on half the squares, I went back with a small paint brush and touched up where all the squares met. Tedious, yes but made my chalkboard look so much better!
Our walls have a tiny bit of texture so the edges of my chalkboard calendar are a little bumpy. This will be solved by putting some moulding around the edges to cover them, which will also provide a small ledge for chalk (I’ll update this post with a picture of the final finished product when it’s done). I’ve also decided that the vinyl lettering above now must go because it’s crooked and off-centre from the new chalkboard. I’m thinking I might put a decorative clock in its place.
I’ve developed a huge love for chalkboard paint lately and I still have about 85% of the can of grey chalkboard paint left…what can I create next?!?
2 Responses to "Chalkboard Wall Calendar"
[…] cubes out of MDF. I intended to use them on the blank wall in our kitchen, but instead, I put my chalkboard wall calendar there. So the cubes sat in the garage for more than a year while I decided where to put them […]


May 24, 2011 at 8:32 pm
I am soooo in love with this. What an amazing idea. I also pinned it for future inspiration when I have a house 🙂 Thank you for sharing I am visiting from keeping it simple linky party. Come and say hi. I also have a really fun giveaway at the end of this week 🙂
A Mommy’s life…with a touch of YELLOW
tyandwhitneyulrich.blogspot.com